Condo renovations take a lot of planning and preparation, but once you’ve been through the initial phase of deciding what to do, and then determine who you will hire to do the work, the fun part can really begin.
During this phase of our project, we needed to decide how much value we could add to our condo through the renovation. What could we do in the kitchen that would make it stand out? What did we need to do in the bathrooms that would increase the value of our condo? What about flooring – was there anything we could do to make it special?
These are all areas of concern any condo renovator needs to consider. Although we don’t plan on selling, we wanted to be sure everything we did would increase the value of our home. That’s the end goal in any condo renovations, to get more when it’s the right time to sell. So what condo renovations are really worth doing?
How to Demo Your Condo for Renovation
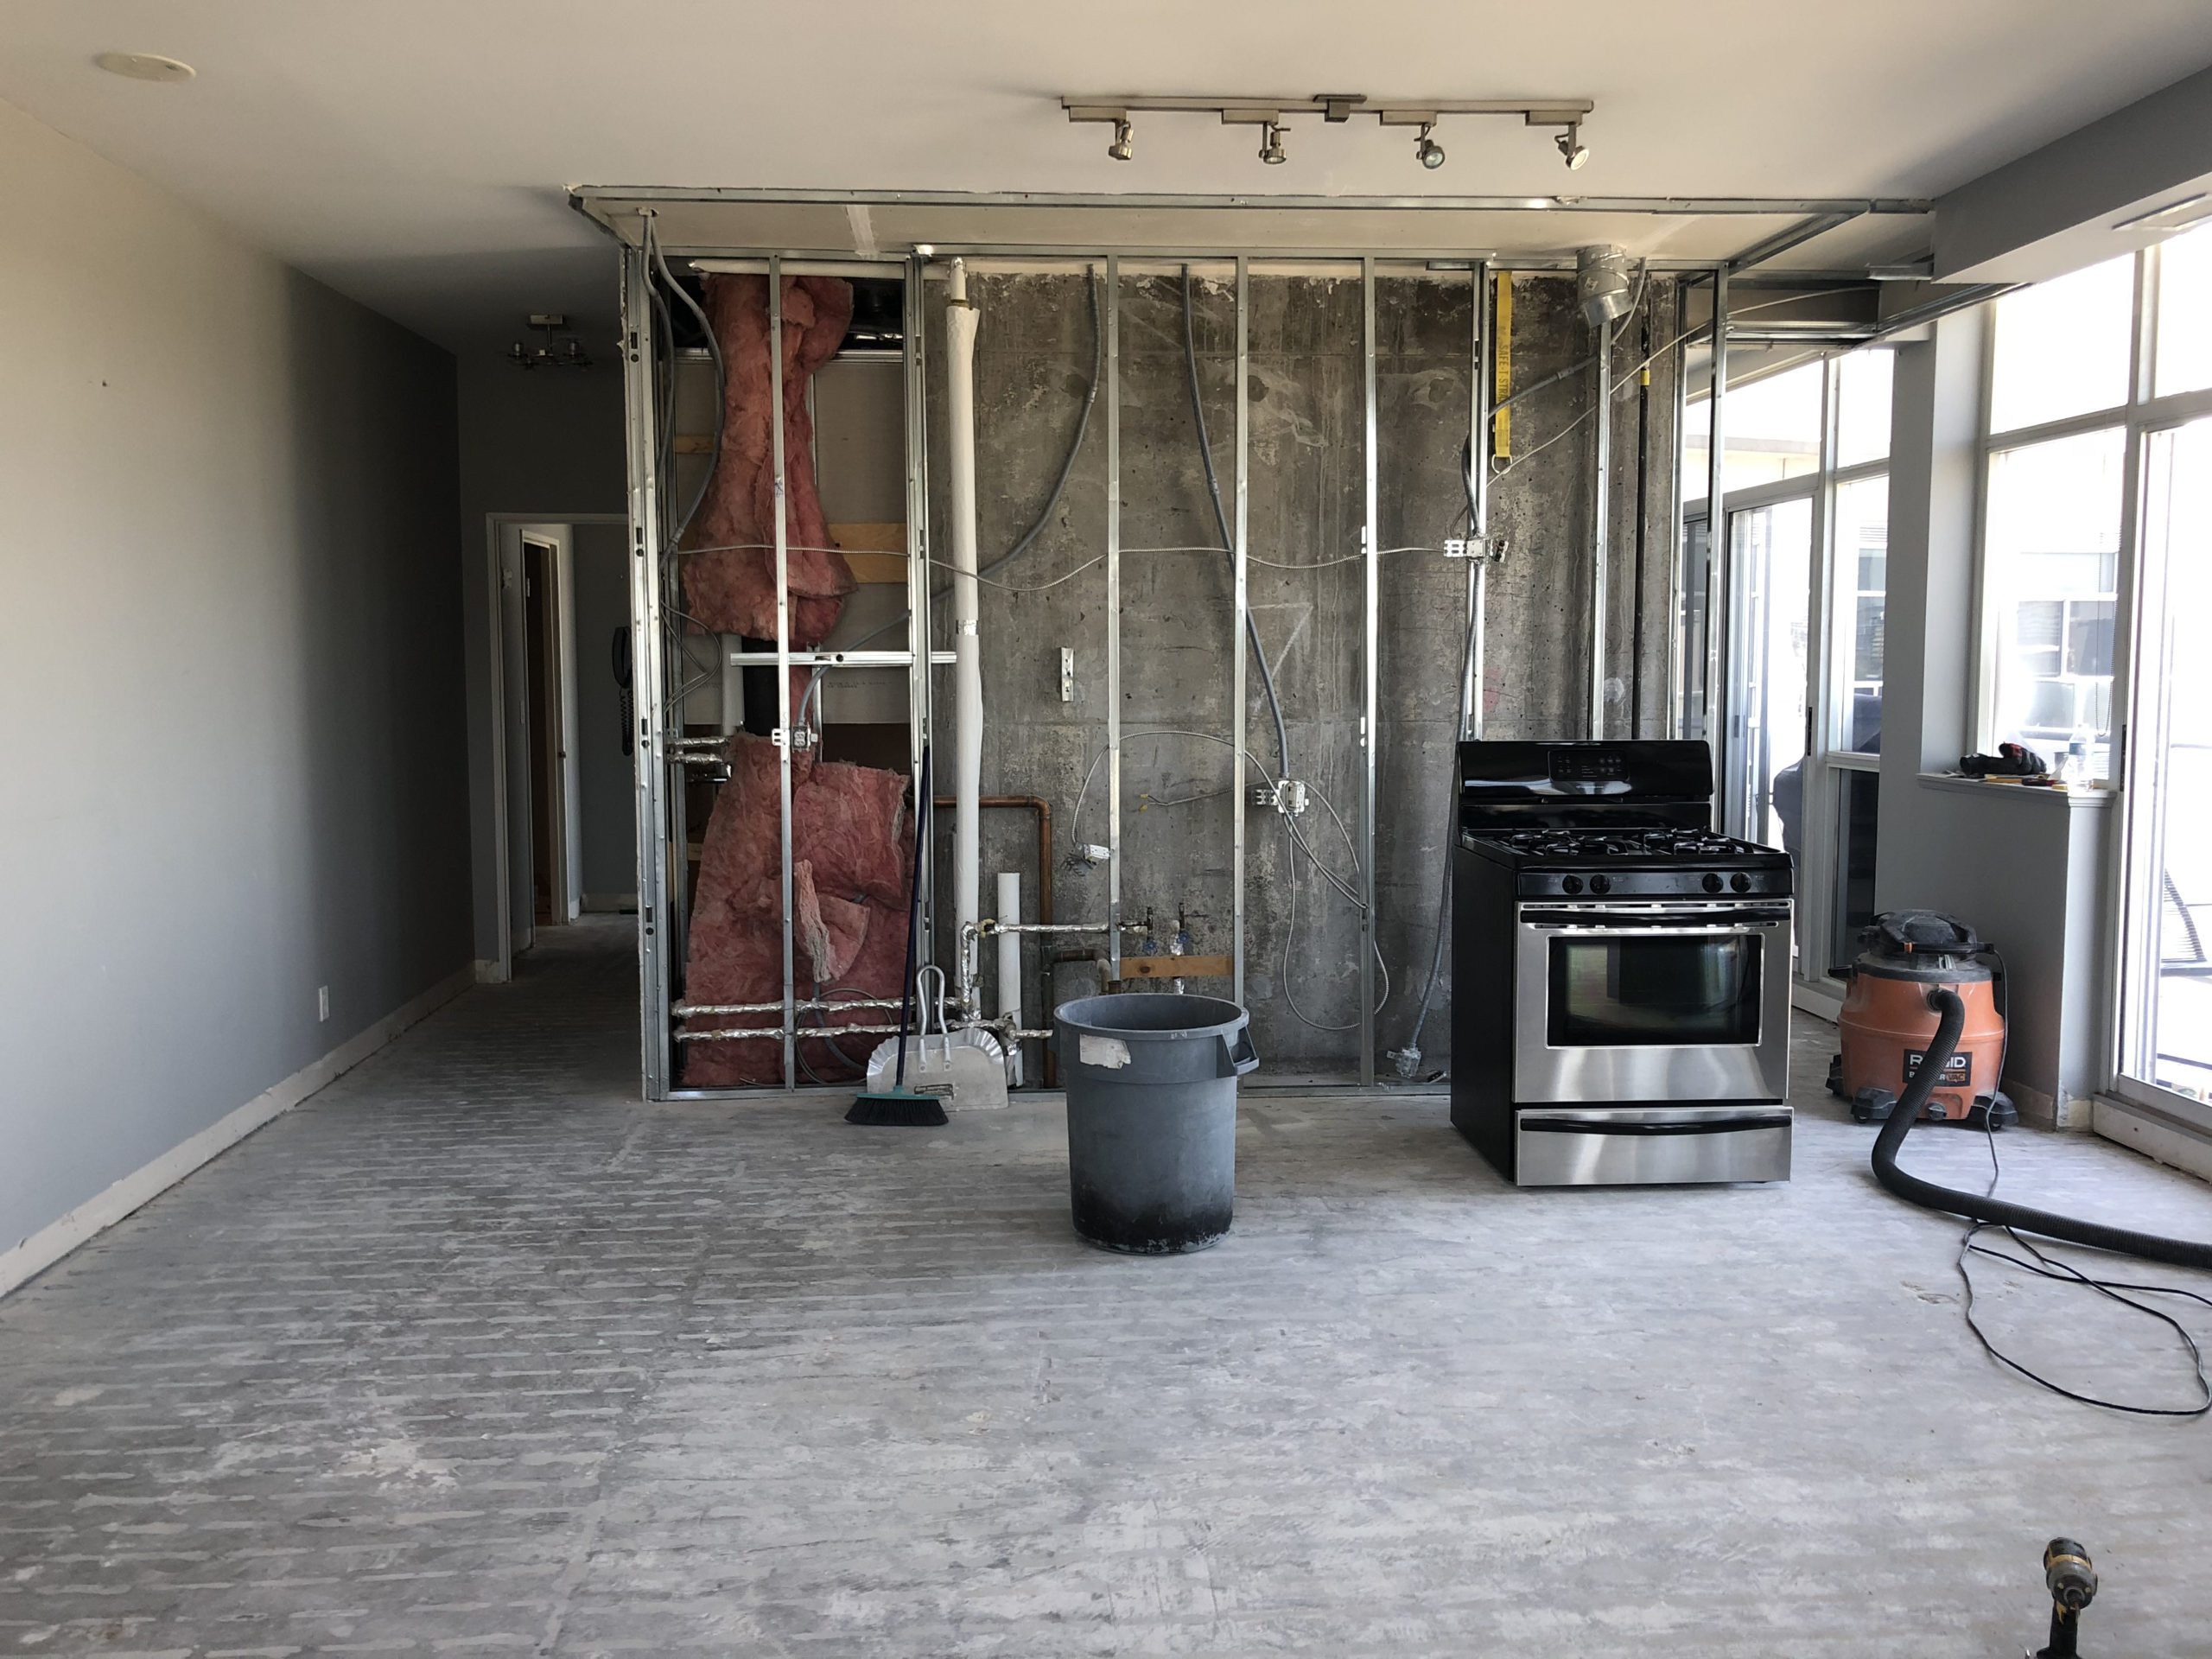
The green light was given to start the demo of our condo, so day by day the condo was disassembled. The flooring came up, the kitchen and bathrooms were removed – it was taken down to the studs just how we wanted.
The majority of the demo was complete in about 7 days. The flooring took more time than expected but everything else was seamless. Adhering to the condo board and renovation rules of working within certain hours was important to us, and our contracting team. Make sure you know your condo building renovation rules before getting started. We all wanted to be sure there was as little disruption as possible to the neighbours on our floor.
Notifying neighbours ahead of time is something we recommend, especially if the process is going to take a month or two. Keep your hallways clean and mess to a minimum. We received so many compliments from our neighbours about how clean the team at Red Mailbox was – from vacuuming the hallway each night to sweeping out the elevators – they made a positive impression among our condo management team from day one.
Condo Interior Design: Fine Art of Furnishing
Working with Karin Bennett Designs was a great decision we made earlier in our condo renovation process. Karin understood where we wanted to be as far as colours and aesthetic but the major task of selecting our furniture and finishes was now upon us.
Furniture tends to take anywhere from four to ten weeks to arrive, so we needed to start making some decisions. After a few interior design sessions with Karin, we started to receive selections via email that we could look at. Karin sent us a number of options all grouped together in rooms, so we could have an idea of how it would all look together in our condo.

This not only saved us time, it really helped us imagine what the finished rooms would look like. I can’t imagine doing this part on our own – driving all over the GTA each and every weekend looking at options and getting confused and frustrated?? No thank you. This is just what we wanted, and we made our decisions quickly and confidently. This is why you need an interior designer when you’re renovating your condo.
Our Top Condo Renovation Tips: Get the top 10!
Kitchen Condo Renovations: Picking Your Dream Kitchen
Since our kitchen still had the standard builder-basic finishes, we knew we wanted to change it completely to give a totally custom feel. As in most condos, the kitchen is the anchor of the main living space, so we wanted it to take center stage and inform the rest of the design of the room.
What were the options for renovating our condo kitchen? We selected a deep navy blue for the cabinets as it provided a pop of colour while remaining neutral. Thinking about how you can make your cabinets unique is something all condo renovators should think about – how can you make your unit look different from all the others out there? Pops of colour that are still within a neutral pallet will always work.
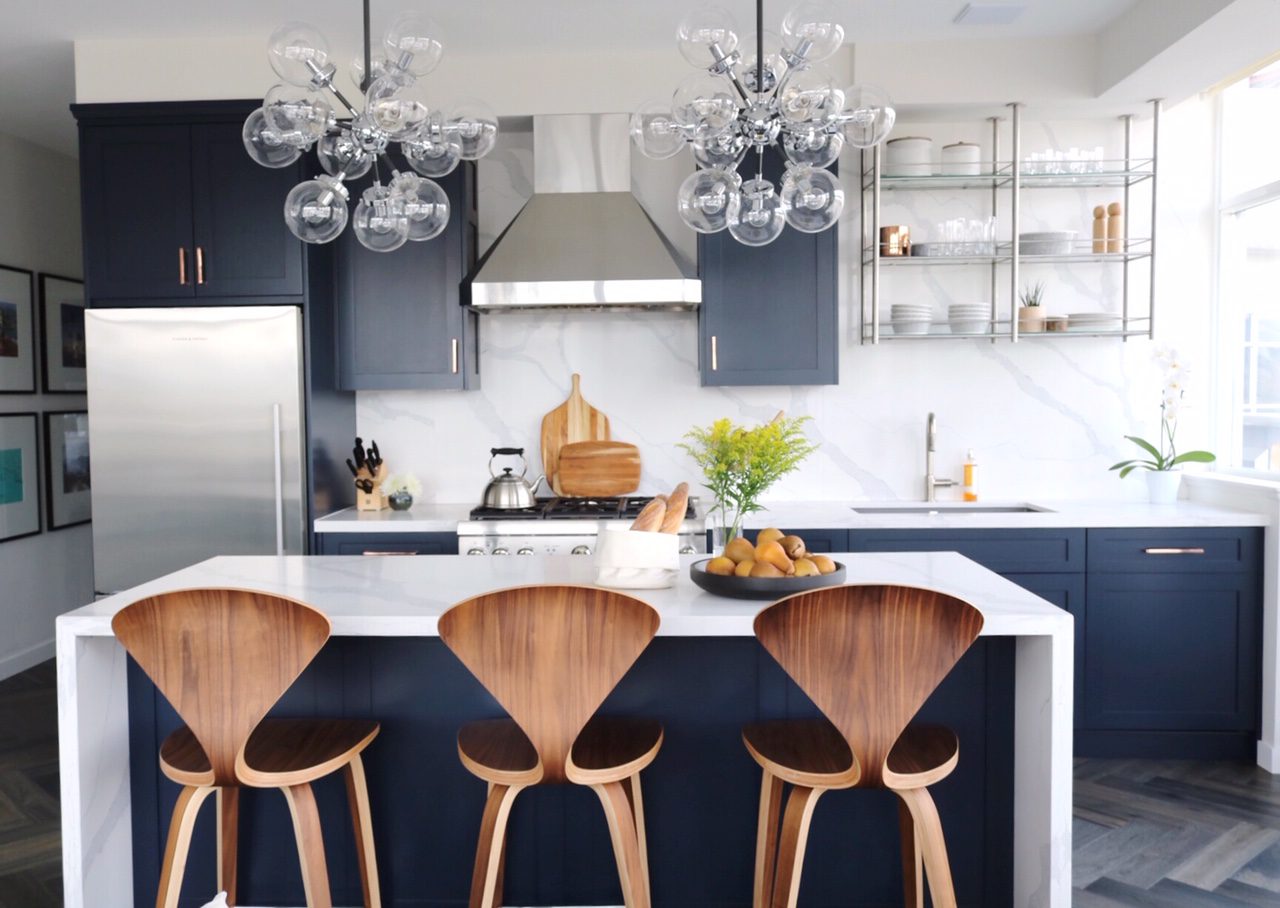
Another piece of the kitchen that would add value is exceptional appliances. Most condos come with a 30” range, but we changed ours to a 36”. Our Thermador range is a showpiece in the condo and it really provides for a custom feel. We also had custom open shelving made for some of our uppers, allowing for an airy feel within the kitchen.
Most condos also are sold with an island – ours was small and square and we knew we wanted something bigger. Karin suggested a 7-foot long island and we absolutely loved this idea. A longer island can elongate the space and provide a wow-factor upon entry. It’s a great anchor for the room and if you entertain like we do, you know the island in a condo is where everyone gathers.
Part 4: Common Problems & Mistakes to Avoid When Renovating a Condo
If you’re interested in learning more about condo renovations and the process, stay tuned for more about our adventure over the coming weeks!

TRB Education Hub
Get the real estate resources you need to succeed. Visit our education hub for market insights, guides, podcasts and more.
